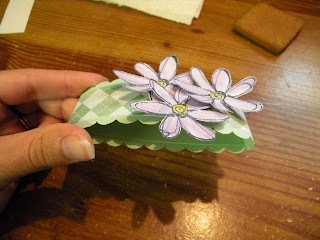
- I completed another pinterest project, a photo wallet. For my 1st one I basically copied the sample, but in the future (as I plan on making more, I mean what a cute gift idea!) I will probably try my own style and design!
- I am adding the instructions if anyone wants to make their own!!
- Supplies:
- One 4 ¼" X 12" piece of cardstock for Wallet
- Three 3" X 8" pieces of cardstock for the Photo/Journal Covers
- Four 2 ¾" X 3 ¾" pieces of neutral cardstock for 3 (optional) Journaling Inserts and 1 Photo Cover Layer
- One 1 & 1/8" X 8 ½" strip of cardstock for the Belt layer
- One 1 & 5/8" X 8 ½" strip of cardstock for the Belt
Step 1
Score wallet piece at 3 ¼" and 6 5/8".
Step 2
Turn wallet piece to opposite end and score at 1 5/8" and 1 7/8".

Step 3
Use corner rounder to round all four corners of wallet.Step 4
Stamp both sides of the wallet.

Step 5
Score each of the photo cover pieces at 4".
Step 6
Use corner rounder punch on all corners of the photo cover pieces.

Step 7
Stamp each of the photo covers, inside and out. One of these will include a neutral layer on the outside. Embellish each cover as desired.Step 8
Use corner rounder punch to round one end of each of the neutral cardstock pieces. One end will have two square corners, while the other end will have two rounded corners.


Step 9
Use one of the neutral pieces as the journaling area of each photo cover. Stamp to coordinate with each respective cover.Step 10
Adhere to the inside top flap of each photo cover.Step 11
The fourth neutral piece is used as the front layer on one of the photo covers. Stamp and embellish as desired, then adhere to the front of one photo cover.Step 12
Adhere each finished photo cover to the inside of the wallet, alternating the direction of the opening edges, i.e. open right, open left, open right side.


Step 13
Score both belt pieces at 1 ¾", 2", and 5 ½". Stamp and embellish each as desired, then adhere the two belt layers together. Sharpen the scores with a Bone Folder.
Step 14
Place the belt around the folded wallet and determine the best fit to allow the belt to easily slip onto the folded wallet, yet keep it closed. Use Sticky Strip™ to adhere the shorter end of the belt layers on top of the longer end.
Step 15
Use a punched or cut layer of cardstock on which to build or stamp the main focal point for the belt & wallet. Use Sticky Strip to adhere to the front of the belt.


Your project is adorable. How pretty and functional, too. Nicely done and thanks for the instructions!
ReplyDeleteSo cute!
ReplyDelete